

Welcome to
The Delish Dish
Where Every Bite Tells a Story
Cincinnati and Northern Kentucky’s Most Award-Winning Custom Caterer

Cincinnati and Northern Kentucky's Premier Certified Woman-Owned Catering Company
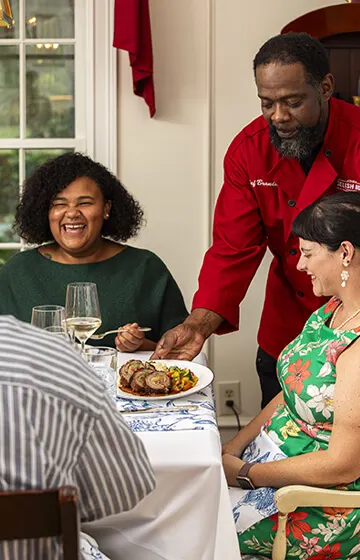
Exceptional Team
At The Delish Dish, we’re not just dedicated to creating unforgettable culinary experiences; we’re a certified, award-winning, woman-owned business that brings passion, innovation, and a commitment to excellence to every table we serve. Join us in celebrating a world where diversity, creativity, and outstanding gastronomy come together to create magic.
Read More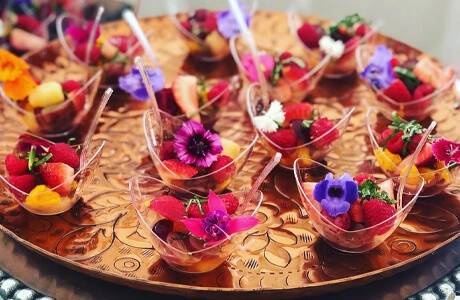
Experience the Extraordinary
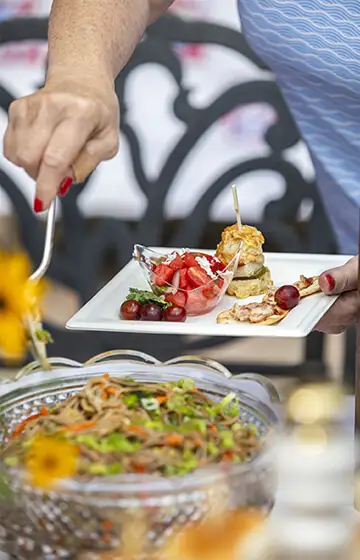
From intimate gatherings to grand celebrations, our expert team is dedicated to crafting unforgettable culinary experiences that delight the senses and bring people together. Whether you’re planning a wedding, corporate event, or a private party, The Delish Dish provides personalized service and bespoke menus tailored to your exact needs.

Catering for Every Diet: Deliciously Diverse Menus
As a leader in the catering industry, The Delish Dish is proud to offer menus that cater to a variety of dietary needs every day. From gluten-free to vegan, from keto to allergen-friendly, our team expertly crafts dishes that meet your specific dietary requirements without ever compromising on taste.

Sustainable Catering & Food Redistribution
We pride ourselves on sustainability and eco-friendliness, ensuring that our practices not only please your palate but also respect our planet. We extend our commitment to the community by donating surplus food to local shelters, ensuring that our food redistribution efforts support those in need while minimizing waste.
Empowering Every Event with Exceptional Taste
Founded on the principles of passion, innovation, and empowerment, The Delish Dish stands out as a beacon of creativity and leadership in the catering industry. By choosing us, you celebrate and support the spirit of female entrepreneurship while ensuring your event dazzles with impeccable taste and flawless execution.
See our menusFrequently Asked Catering Questions
What types of events do you cater?
The Delish Dish specializes in catering a wide variety of events including weddings, corporate gatherings, private parties, and more. We tailor our services to meet the unique needs and themes of your event. We offer full-service and drop-off catering.
Can you accommodate dietary restrictions and allergies?
We take pride in accommodating a range of dietary preferences and allergies. Our menu options include vegetarian, vegan, gluten-free, and allergen-free choices. Please inform us of any specific requirements when booking.
How far in advance do I need to book your services?
We recommend booking our catering services as early as possible, especially for larger events. Please contact us at least one month in advance to ensure availability and detailed planning for large events. We ask for 10-14 days for smaller events, although we can sometimes accept requests with 7 days notice.
What is included in your catering packages?
We are a completely custom caterer; however, our full-service catering offerings typically include food, setup, service, and cleanup. We provide detailed menus, staffing, and can also include tableware and linens upon request.

Awards and Accolades
We are honored to be recognized by peers, local chambers of commerce, and small business organizations for our commitment to excellence, including being named Kentucky Small Business of the Year in 2020 by the SBA. Each award we receive motivates us further to innovate and elevate the catering experience, ensuring that we continue to serve you nothing but the best.


The Delish Dish catered our wedding reception. The food was a huge hit!! Every item on the menu was incredible! Our guests are still raving about it!! Mavis and her team put on a top notch dinner. The service was smooth, the presentation was impressive, and the staff was so friendly!! Highly Recommend!
Chris D, 2022
Plan Your Next Catered Event With Us
Call Now 859-250-0881
We would love to hear about your event and discuss how we can make it unforgettable. Please fill out the form below with your details, and our team will get back to you promptly.